BSA crank removal
I need to remove the crank from a BSA engine in a Ransomes 14.
I am having difficulty separating the centrifugal clutch from the end of the crank.
I would appreciate it if someone could point me in the right direction
regards
Pat

Forums

Meanwhile I’ve found an…
Meanwhile I’ve found an engine manual which suggests that the flywheel may be mounted on a taper and held in place by a nut or set bolt on the end of the crank, within the clutch.
In that case proceed as follows. Put your pry bar between the clutch drum and the flywheel and apply a moderate amount of leverage. Then strike the opposite side of the flywheel with a soft faced hammer ***parallel to the shaft. Move around the drum with the pry bar doing the same . Hopefully the top shaft will pull out of the clutch spigot bearing within the flywheel, freeing off the engine . It may bring the spigot bearing out with it.
My engine manual suggests that here will be either a nut or set bolt behind the bearing . With the bearing removed, loosen the nut or set bolt but do not fully remove either at that stage. The flywheel will probably still be tight on its taper. Place the engine on a substantial bench or the floor and support the flywheel on wooden block so that side of the engine base is just clear of the bench or ground. Then take a drift and hammer and strike the engine side of flywheel boss a couple of times . Hopefully the taper will release but the flywheel will be retained by its nut or set bolt and not land on your foot!
Hope that this makes sense.
***If you don’t have a suitable hammer, enlist assistance to keep the tension on the pry bar , and use a club hammer and wooden block.
Thank you Wristpin. Did as…
Thank you Wristpin.
Did as you suggested and the drum came away with the shaft and bearing.
Simple to then remove the flywheel and then access the crankcase.
That’s good. What has caused…
That’s good. What has caused the need to access the crank ? Hope nothing too serious.
Fairly serious ! The…
Fairly serious !
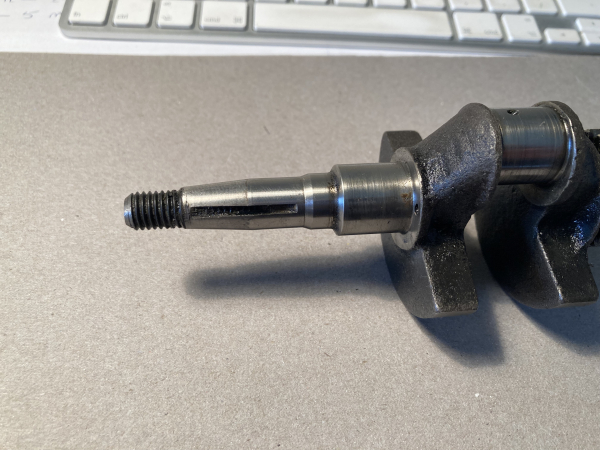
The flywheel / magnet was very tight on the shaft. I got a bit carried away with the hammer and damaged the thread.
Fortunately a local and very understanding engineer repairs it for me. Charged me a very reasonable £10.
I am used to working on bigger, stronger cranks so taught me a lesson.
Oh dear! However there are…
Oh dear! However there are few of us who can honestly say that we have never had a similar buttock clenching mishap; self inflicted or otherwise. You are fortunate to have found a skilled man to dig you out of trouble.
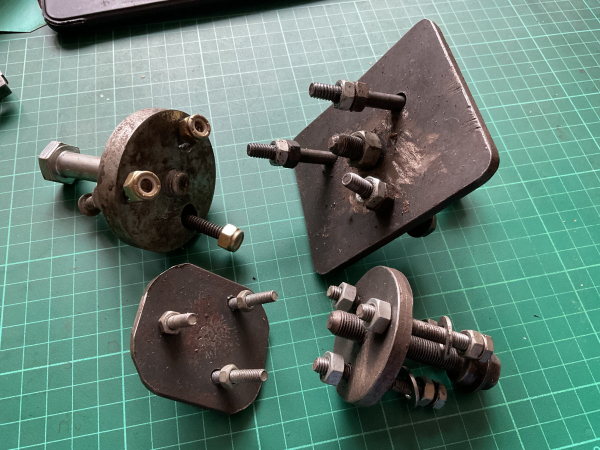
I haven’t got any reference material to hand for your engine but I’m guessing that the flywheel is drilled and tapped for two or three puller bolts . The next size up, The BSA F12 certainly is and I still use the puller that I made 40+ years ago, together with a collection of other ones as needed.
Assuming that your magneto has a separate coil, points and condenser an option may be to replace the points and condenser with an electronic trigger unit, such as a Meco module which can usually be fitted within the mag, this is fit and forget doing away with the need to remove the flywheel in the future.
Next problem is refitting…
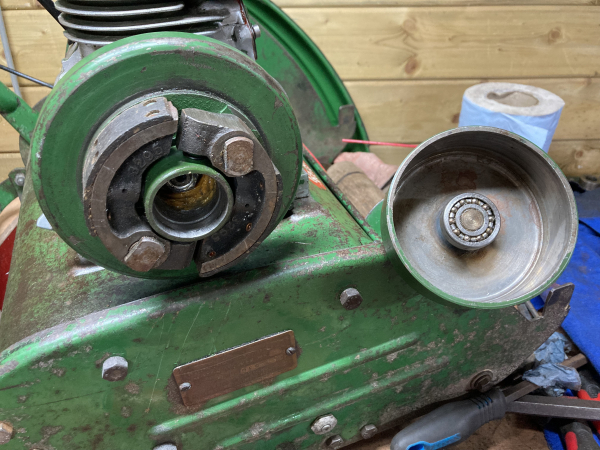
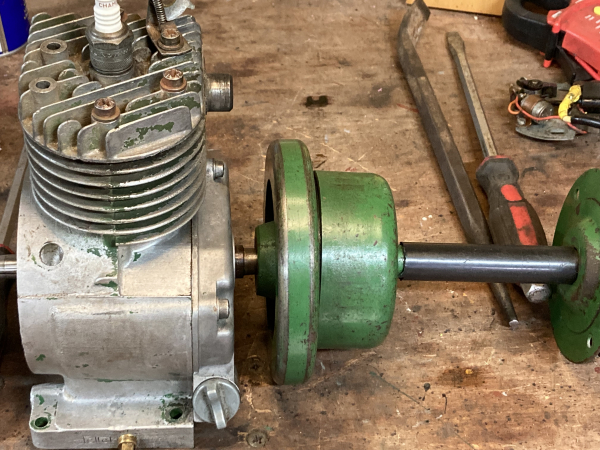
Next problem is refitting the shaft with spigot bearing. The drum has been welded onto the shaft. I don't know if this is original or been done later. Each time I offer the shaft with bearing to the clutch housing, the bearing cocks over. Everything is covered by the drum.
Fitting the bearing first might be an option, but removing the bearing from the shaft will probably damage it.
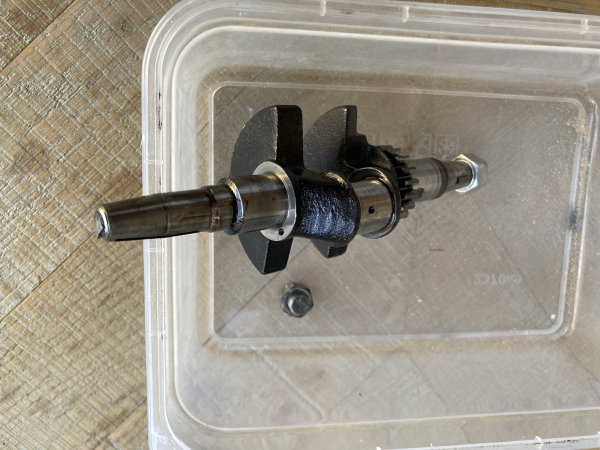
First picture shows the clutch and the drum.
Second shows what I am aiming for.
Any suggestions would be warmly received
On later machines such as…
On later machines such as the Marquis the drum is a keyed sliding fit on the shaft and can be slid away to aid visibility on reassembly, but you have what you have .I think that the bearing can be safely removed using a two or three leg puller. Create a small chamfered lead on the shaft and polish both it and the shaft with some fine emery cloth strip to aid its entry into the bearing. Refit the bearing into the clutch and with a bit of practice and patience line up and enter the shaft. Once entered you may need to tap the sprocket end of the shaft to get it fully into the clutch . A little lubricant on the chamfered end of the shaft may assist.
Having the shaft reassembled to the chassis and the engine standing on the platform, but not bolted down, may assist with alignment .
Thanks for the advice…
Thanks for the advice. Bearing slid off nicely with a puller. Worked on the shaft with some emery and it all went back together smoothly.
Back up and running now, Restoration nearly completed.
Hello Pat, I have a…
Hello Pat,
I have a similar engine, and I've just had the crank shaft machined for almost the very same reason! Have you got any tips for getting the little cam back on the shaft which actuates the points? I get it up to about 3-5mm play between the cam and the oil seal in the crank case. I'm scared I'm going to break something now...
All the best
Nick
Without having an engine to…
Without having an engine to look at, an image or two will help.
I presume that the position of the cam ring is located on the crank by a key or key way ?
Does the cam ring have any numbers or even an arrow on one of its vertical faces ?
Does one face have an internal chamfer?
Not worked on one of those…
Not worked on one of those for ages but you may find it easier to reassemble the top shaft to the chassis, leaving the engine loose. Then, before we go into any more detail , have a look at the clutch flywheel boss at the engine side and see whether there is one or two socket head grub screws securing it to the crankshaft. If there is/are , slacken them off and the crank may pull out of the clutch flywheel.
Hopefully, meanwhile someone can post the relevant pages from the parts book, or the workshop manual.